Half sheet c/s size
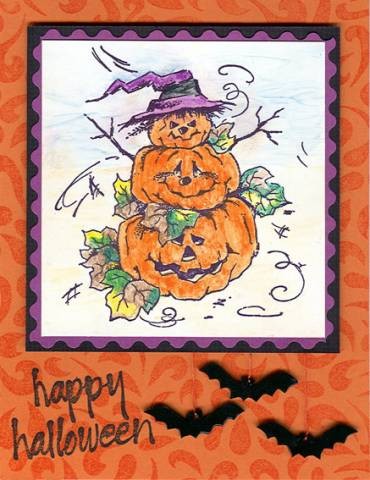
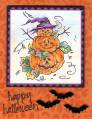
I found the free pattern for the bats online through a search since I didnÂ’t have a stamp. I traced around it the pattern with a metallic silver gel pen. It worked great to see for cutting and wipes right off. I did use a hole punch on the polyshrink and found the long reach by Marvy worked better than the hand held style. I ripped one up using the hand held. I used a metal tool to hold the poly down by putting it in the hole, a stylus for dry embossing would work fine. To flatten the bats I stamp them with the wood side of the stamp while itÂ’s still very warm. For the ties I just use thread and triple knotted it then took both end up under the design which is held down with double sided foam tape. Make sure the thread is taped between the design and foam so they have room to swing easily, hence the reason for foam tape! I arranged the bats lying flat on the table with the design panel and made a tiny dot with permanent maker where they should hang from the card. This way you know right where to tape them with one sided tape before the foam goes on. If you canÂ’t make bats after reading these directions youÂ’re just poly bat impaired, but I have complete confidence that you can do this easily.
Date: Friday, October 14, 2005 GMT Views: 996
Favorited:4
Stamps: SU – Canvas (on the black layer), Stampassions – pumpkins, Vap Scrap – message – (Michael’s dollar stamp), Swirl background is an unknown unmounted
Paper: SU – Only Orange c/s, Non SU white glossy c/s, purple and black paper
Ink: SU-Classic – Basic Black, Only Orange
Accessories: Watercolor crayons, aqua painter, decorative scissors, polyshrink, thread, foam double sided tape, single sided tape, heat gun