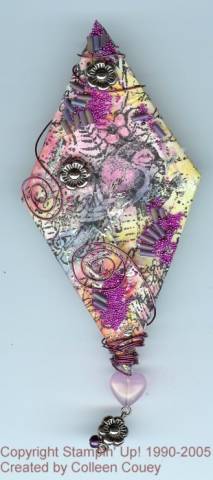
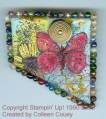
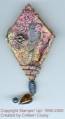
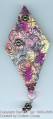
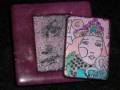
Haven't made any pins since before Christmas and territweety's pin got my creative juices flowing. Wanted to make a garden collage pin to wear to meetings and get them to want to buy $50 worth to get this great limited addition stamp set!
Date: Tuesday, January 11, 2005 GMT Views: 2162
Favorited:28
Absolutely beautiful! Do you have the technique posted somewhere, because I don't know what the tissue and foil are used for? Thanks. [email protected]
I guess I will post how-to here. I am not sure where else to do it. So here goes: Supplies needed: Foamcore board, exacto knife or old scissors, small piece of white tissue paper, stazon black ink pad, mister bottle, reinkers, q-tips, white glue, clear drying glue(optional, I don't like it's looks after using this), assorted stamps, pinn back, metallic pens, foils and foil adhesive, bead or old jewelry, buttons, glitters, wire, eyepins, headpins, etc
1. Cut out a foamcore board shape with scissors or an exacto knife.(Foam core can be found at hobby stores or walmart with the poster board)
2. Stamp on plain piece of white tissue paper with a waterproof ink(stazon or similar). Heat set with heat gun.
3. Work on wax paper. Spritz water on your tissue paper. Then drop a drop of reinker on waxed paper and take your q-tip and dip in color(I also spritz the q-tip so the colors won't come out so dark) then dab it on your tissue paper project. If it tears, it is ok, if it gets wrinkled thats ok too. Heat set with heat gun.
4. Cover the surface of foam core piece with white glue(I use another q-tip). Work out the tears and wrinkles, they just add character! Dry with heat gun.
5. Spnge or dab on a little foiling adhesive--when dry press the foils onto the pice. You can also antique the piece with Rub-N-Buff or brown or gold ink.
6. Use E-6000 glue or something similar and glue on beads, micro beads, charms, glitter, wire, whatever!
7. To add a dangle, I start with a head pin and basically build the dangle from the bottom up. Put a small bead on and cut the pin off, with needlenose pliers, you curl it around an eyepin. Then add the next bead, but off the eye pin with enough space to curl it and attatch another eye pin, etc. You can put the whole dangle on one pin, but you don't get the movement that individual pin/bead combo gets. When you add the dangle to the pin, you simply dip the last eye pin in E-6000 and push it up into the foamcore.
8. Wrap with wire if you'd like.
9. Go around the edges with a metallic marker to kind of finish off the edges.
10. Glue pin back on the back.
11. If you desire, you can add a layer of clear glue or Diamond Glaze to seal the pin. I don't. I like the way it looks better before this step, so I just don't do it!
If you have questions email me privately [email protected]
Thanks! And have fun!
Registered: June 19, 2003 Location: Super Bowl City, TX Posts: 34508
Tue, Jan 11, 2005 @ 12:45 PM
These are amazing!!! Thank you so much for the info. I cannot believe that these are from foamcore board!! I actually saved pieces of this for something I did at Christmas. WhooHoo!! Makin' pins!!!
------------------------------
Jackie G. (aka Jacquita) SCSmember #656
Write your sorrows in sand and your blessings in stone.
territweety: I had a great teacher that has been making all sorts of pins for years. So, I just copied some of her ideas and I invested a mint in supplies, and find I use the same kind of beads, etc and don't use the other stuff. I love your pin. Sometimes simple is better! And your pin sure got me going on pins again!