Accordion Style Card Holder
by Jane Matsumoto
Create a beautiful and functional accordion style folder to hold cards.
Supplies
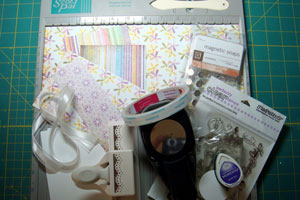
- One 6" x 12" piece of patterned paper
- One 4" x 6" piece of patterned paper
- Two 3 3/4" x 4" pieces of patterned paper
- Three 3 7/8" x 5 1/2" pieces of white cardstock
- Three 1 3/4" white cardstock circles
- One 2" x 6" piece of patterned paper
- Scor-Pal™, or other scoring tool
- Scor-Tape™, or other strong adhesive
- Decorative border punch, optional
- Ribbon
- Magnetic closure
- Stamps, ink
Step-by-Step
-
Step 1
Score the 6” x 12” patterned paper piece at 4-1/2”, 6-1/2” and 11”, creating the base.
-
Step 2
Score the 4” x 6” Patterned Paper piece at 2”.
Use a decorative edge punch on one end if desired.
Attach this piece along the scored 1” section of the base with Scor-Tape™.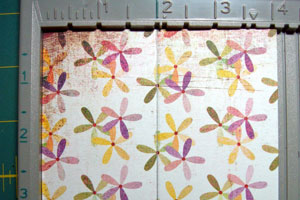
-
Step 3
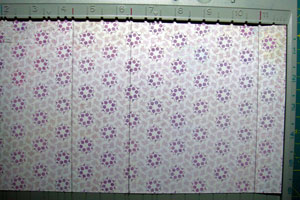
Score the 3-3/4" x 4" patterned paper piece every 1/2" across the 4” side.
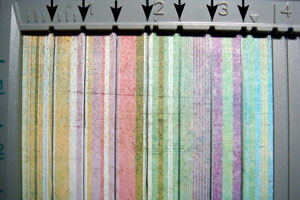
-
Step 4
Crease scored lines well and attach accordion pieces to the sides of the base. Take care to line up right along the edges of each panel.

-
Step 5
To add the ribbon, put Scor-Tape™ on the seam underneath the top flap, and attach the ends of the ribbons, about 1-1/2” from each end.
Adhere the 2” x 6” patterned paper piece to cover the seam and ends of the ribbons.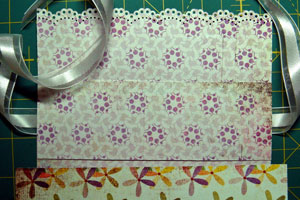
-
Step 6
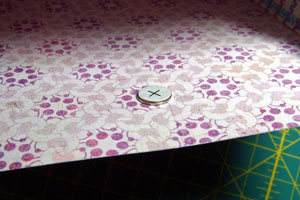
Secure a magnet to the inside of the front panel using Scor-Tape™.
-
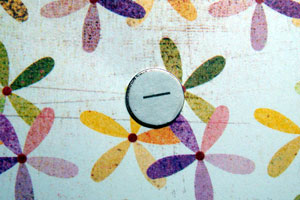
Step 7
The matching magnet will automatically stick to the front panel covering the first magnet. Peel off the magnet's sticker and also the adhesive under it. Replace with Scor-Tape™. Close the flap over the exposed magnet and press so that it attaches to the underside of the flap.
-
Note:
Please refer to the video to see how the magnets are attached.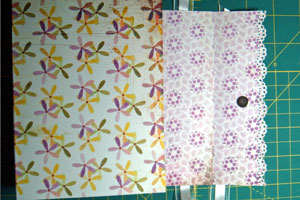
-
Step 8
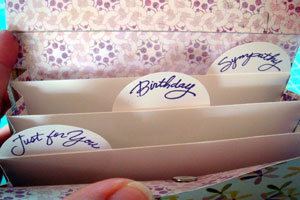
Use stamps to label circles and adhere to the backs of the 3-7/8” x 5-1/2” cardstock pieces. Insert into the accordion slots.
-
Step 9
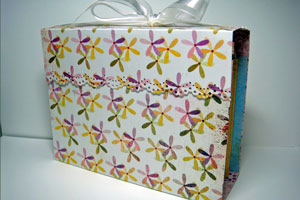
Your accordion style card holder is finished.
Video!
Your Turn
You've seen the tutorial, now you try it! We've got a section of the gallery set aside for Accordion Style Card Holder. Try this technique, then upload your artwork to the gallery. Show us your creations!
***Please note - Internet Explorer/Edge is not a supported browser, and will not allow you to see the videos. Please use Chrome, Firefox or Safari to view our tutorial videos.

 *
*
Questions and Comments
We'd love to get your feedback or questions. Leave your comment below.
I'm so excited to make this !!
Big hugs
Thanks!
Aloha, Charlene
There has been several questions about the magnets. They are "BasicGrey Magnetic Snaps" and there are two sizes: small and large. You can see what they look like here on BasicGrey's webpage...
http://www.basicgrey.com/scrapbook/search/magnetic+snaps
Page 1 of 5 pages 1 2 3 > Last »