Flat Backed Treat Box
by Patti Gilliam
Try this fun twist on a treat box, and showcase your artwork!
Supplies
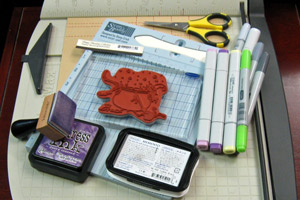
- One 7" x 9" piece of cardstock
- Scoring Tool
- Strong Adhesive
- Paper Trimmer
- Scissors
- Stamps
- Ink
Step-by-Step
-
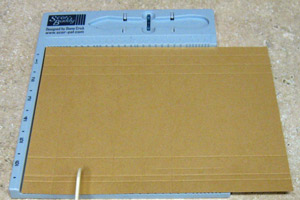
Step 1
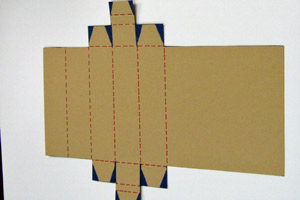
Score the 7" x 9" cardstock on the 9" side at 1", 2", 3", 4" and 5".
Score on the 7" side a 1/2", 3/4", 1 1/2", 5 1/2", 6 1/4" and 6 1/2".
-
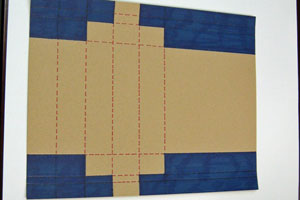
Step 2
Cut out all sections of cardstock that are shown below.
-
Step 3
Trim in only to the long fold lines, as shown in blue. This will create your tabs.
-
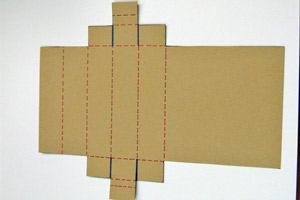
Step 4
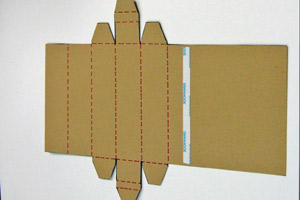
You will want to slightly trim each tab, to ensure a nice, but snug, fit.
-
Step 5
Add strip of Scor-Tape™on the largest piece, about 3/4" from the last score line.
-
Step 6
Fold all score lines as shown below.
If you are planning to stamp directly onto your box, you should do that now.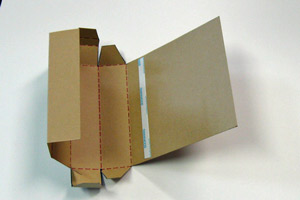
-
Step 8
Assemble box, by folding in each section, until they meet at the adhesive strip. Remove strip, and adhere the box body to the box ‘back’. Fold in the two short tabs on each side. Fold the long tab over the two short tabs, and score the small outside line – it should easily slip inside box for closure.

-
Step 9
Decorate as desired.
This box ‘back’ is a perfect place to showcase your own artwork. It’s also perfectly sized for Hershey’s Kisses, or other small gift items.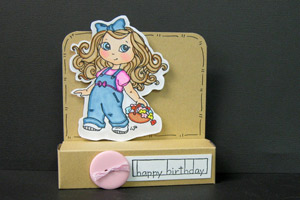

Video!
Your Turn
You've seen the tutorial, now you try it! We've got a section of the gallery set aside for Flat Backed Treat Box. Try this technique, then upload your artwork to the gallery. Show us your creations!
***Please note - Internet Explorer/Edge is not a supported browser, and will not allow you to see the videos. Please use Chrome, Firefox or Safari to view our tutorial videos.

Questions and Comments
We'd love to get your feedback or questions. Leave your comment below.
Your friend and neighbor - Sally McD
I am so proud of you sharing a tutorial-Great job with this one
Page 1 of 2 pages 1 2 >