Mini Accordion Album & Tin
by Lori Craig
Create a tiny album and decorate a tin in which to house it!
Supplies
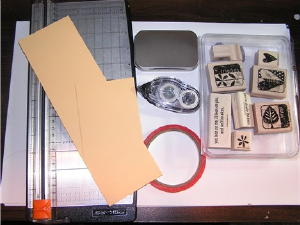
- Rectangular hinged tin (3.9” x 2.5”) (Same size that some breath mints would come in!)
- Source for tins: www.specialtybottle.com - item THN4
- Cardstock (3 pieces) for base of mini album and tin cover: 3 3/8” x 8 ½”, 3 3/8” x 4 ¼”, 2 5/16” x 3 11/16” (for tin cover)
- Misc. cardstock for layering/decoration
- Small corner rounder
- Embellishments
- Crafter’s Tool Kit
- Ribbon
- Adhesive
- Sticky Strip™
- Paper trimmer with scoring blade
Step-by-Step
-
Step 1
Score largest piece of base cardstock
at 2 1/8", 4 1/4", 6 1/4". Fold each panel in accordian fashion.
Score second (shorter) piece of base cardstock at 2 1/8" and fold in half.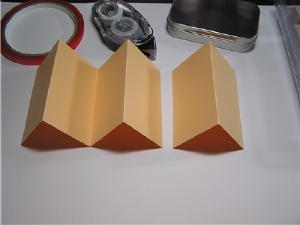
-
Step 2
On smaller piece of base cardstock, cut off the upper left corner on a diagonal. This will form a pocket.
Trim all corners with the corner rounder.
Hint: Try no more than 2 layers of cardstock at one time.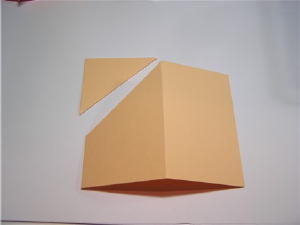
-
Step 3
Fold the pocket around the far right panel of larger base piece of cardstock. Adhere the entire back of the panel and the edges of the pocket to the larger base piece.
Hint: Regular adhesive (such as SNAIL) is fine for the back, but I use Sticky Strip™ on the actual flap of the pocket.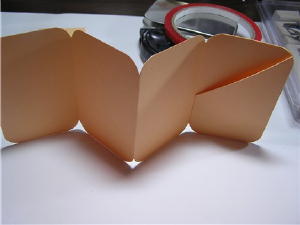
-
Step 4
To line up holes for the ribbon closure: Fold the mini-album up, accordian style and punch a hole in the center of the top panel. Using that hole as a guide, punch the next panel. Repeat until you have a hole in the center of each panel.
Embellish with your favorite stamps and accessories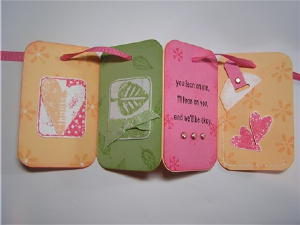
-
Step 5
Cover of Mini Tin
Take your piece of coordinating cardstock cut to 2 5/16" x 3 11/16".
(Optional) Trim the corners with a Corner Rounder.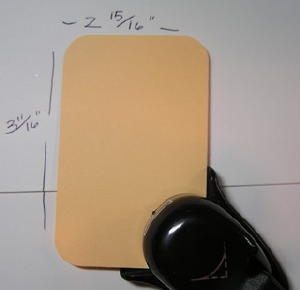
-
Step 6
Embellish as desired.
Adhere to front of the tin with Sticky Strip™.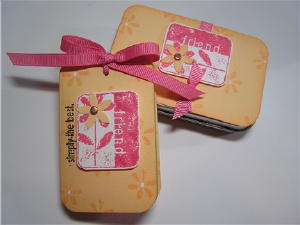
Variations
Decorate your tin
Try these ideas to cover or decorate your tin:
Spray paint or use Sticky Strip & MicroBeads [sample]
Combine spray paint & embossing powder [sample]
Cover with mulberry or tissue paper & attach with ModPodge [sample]
Use sticky strip & ribbon to cover the sides. Make a panel to cover the back [sample]
Cover tin with stamped address labels [sample]
Layers of Craft Ink & embossing powder [sample]
Your Turn
You've seen the tutorial, now you try it! We've got a section of the gallery set aside for Mini Accordion Album & Tin. Try this technique, then upload your artwork to the gallery. Show us your creations!
***Please note - Internet Explorer/Edge is not a supported browser, and will not allow you to see the videos. Please use Chrome, Firefox or Safari to view our tutorial videos.

Questions and Comments
We'd love to get your feedback or questions. Leave your comment below.
Linda I
Page 1 of 1 pages