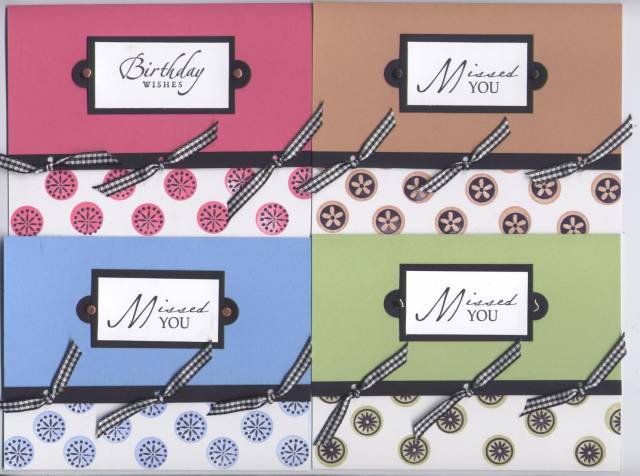
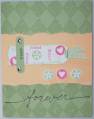
This is my current favorite card template... got it from a JulieHRR workshop in Sept. "Missed You" text was created using the WriteMe Memory Vol II fonts and was intentionally designed to look like Sincere Salutations stamps (Birthday Wishes). These cards are for use by my table leader at lady's Bible study.
Date: Tuesday, October 18, 2005 GMT Views: 1443
Favorited:63
Additional Info
Stamps: Sincere Salutations, Little Pieces
Paper: White, Black, and various CS colors
Ink: Black Classic, and various matching classic colors
Accessories: Black grosgrain ribbon, brads, 1/16" circle punch
Registered: February 24, 2005 Location: .:O Canada:. Posts: 2784
Thu, Oct 20, 2005 @ 11:27 AM
This is a wonderful sketch and design! And the colours are excellent! I looOOoooOOove what you did with Little Pieces! I've been in love with that set since I first saw it! It's #1 on my wish list. This is in my favourites so that I can look to your cards for inspiration. Thanks so much for sharing!
Registered: November 7, 2004 Location: Milpitas, CA (San Jose/San Francisco area) Posts: 1637
Thu, Oct 20, 2005 @ 1:08 PM
Melinda, no, the nameplate is not from a tagsheet. JulieHRR taught this at a Sept. workshop. Here's "my" version of it.
Nameplate as learned from JulieHRR
Materials:
1. 1 piece Black CS: 2 3/8� X 1 3/8�
2. 2 pieces Black CS: �� Circle
3. 2 brads
4. 1 piece CS: 2 1/8� X 1 1/8�, stamped with greeting
5. Adhesive
Directions:
1. Pierce a hole in center of each �� black circle then insert & loosely open brad.
2. Position bradded-circles at right & left sides of black rectangle, sandwiching the black rectangle�s edges in between the head of the brad and the top of the black circle. ... Approx. 1/2 of each circle will be behind the rectangular CS and the other half 'outside' the perimeter of the rectangular CS.
a. Adhere circles to the backside of the rectangle.
b. Gently flatten brads (hammer & mat).
3. Adhere CS with greeting to front of nameplate assembly.
4. Mount nameplate assembly to your item.
------------------------------ Rubber Stampin' Square Dancin' Round Dancin' Mary
Registered: November 7, 2004 Location: Milpitas, CA (San Jose/San Francisco area) Posts: 1637
Thu, Oct 20, 2005 @ 5:30 PM
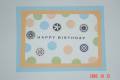
To make these cards (original design by JulieHRR):
1. See how to make a 'Nameplate' posted a few comments previously.
2. 1/2 sheet colored CS, folded in half (so folded card is in a landscape mode with fold at top).
2a. From FRONT flap only of folded color CS: cut off bottom
1 3/8" (discard strip or save it for a rainy day).
3. Stamp 'Little Pieces' on a piece of 2" X 5 1/2" white CS .
3a. Adhere stamped piece from step 3 to inside-bottom of folded color CS (so stampings show while card is still closed).
4. Cut a piece of black CS 1/4" X 5 1/2"; adhere to bottom of FRONT flap's edge of folded color CS (align bottom edges of colored & black CS). See card pic.
5. In 3 places: punch 1/16" holes through where the black strip is adhered.
6. Tie 3 to 4" pieces of ribbon thru each hole.
7. Adhere nameplate to colored portion of card front.
Additional comments: The only color in each of these cards is the single piece of CS for the card's 'body'. Using all black ink & black gingham will make this 'template' extremely versatile. Stamping the COLOR-MATCHED CIRCLES over the 'Little Pieces' was my own addition... and simply 'notches' the card up a bit, IMO.
------------------------------ Rubber Stampin' Square Dancin' Round Dancin' Mary